This question concerns many software developers, sometimes even experienced hands. It is because, in React Native, FlatList and ScrollView components can be used to display lists of content and enable scrolling.
However, let us look at their different use cases and abilities to help us decide when to use each.
1. Size of Content:
We can use ScrollView when we have a small or moderate amount of content that can fit within the viewport without performance issues. We can also use ScrollView when you need to scroll a single, small content area that doesn’t require virtualization.
On the other hand, if we have a long list of data or a potentially infinite list that requires efficient memory usage and performance optimizations, then we should use FlatList.
2. Code Performance
ScrollView renders all its child components at once, even if it’s not visible on the screen. This can impact performance if our list is large or changes dynamically. It is unsuitable for long lists with many items.
In comparison, FlatList renders items lazily, which means it only renders the items that are currently visible on the screen. This virtualization technique makes it efficient for handling large lists. It supports lazy loading, item recycling, and dynamic content updates without re-rendering the entire list. FlatList provides better performance for large datasets compared to ScrollView.
3. Horizontal and Vertical Scrolling
ScrollView is a general-purpose scrolling container and can be used for both horizontal and vertical scrolling. FlatList is suitable for both horizontal and vertical lists.
4. Ease of Use
ScrollView is simpler to set up and use compared to FlatList. FlatList requires specifying a data prop as an array of items and requires renderItem prop to define the appearance of each item.
The renderItem function defines the appearance of each item, and keyExtractor is used to extract unique keys for each item.
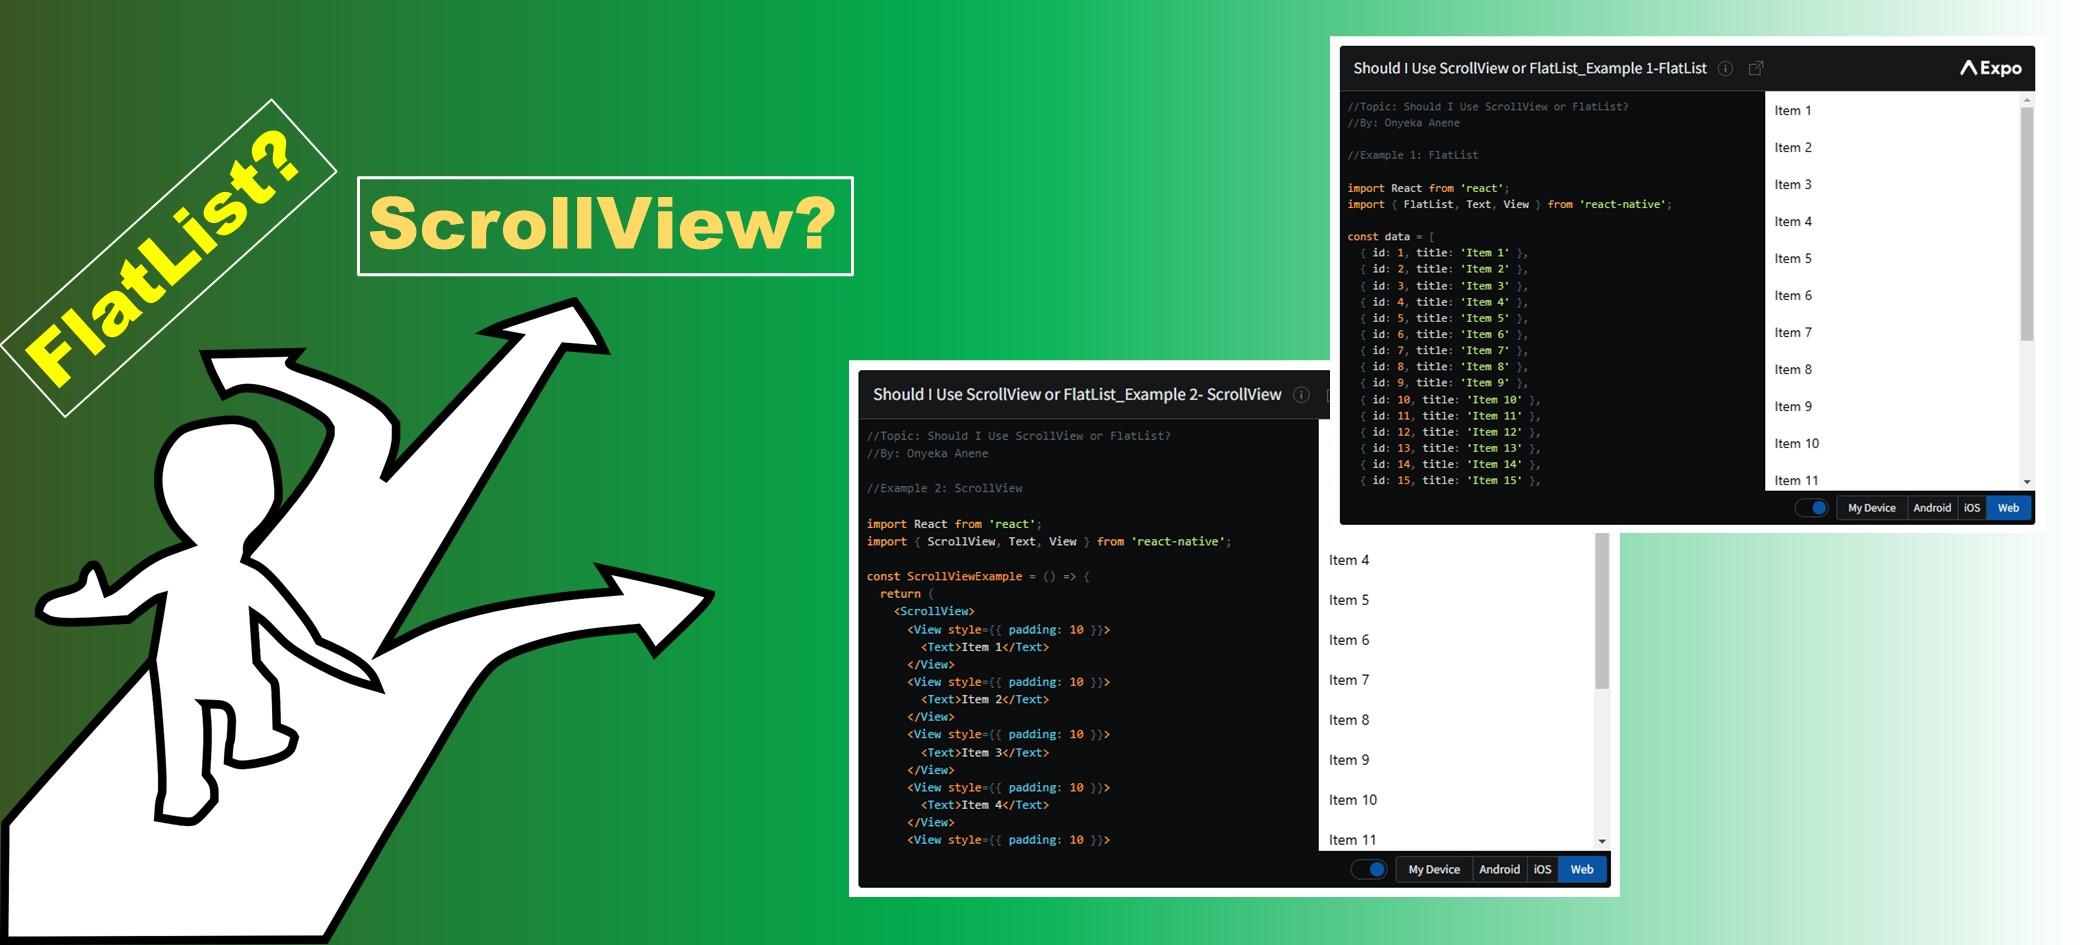
Example 2: ScrollView
In this second example, we use a ScrollView component to create a scrollable view. Inside the ScrollView, we have multiple View components representing the items. Each item is displayed using a Text component.
The content inside the ScrollView is manually provided without using a data array or dynamic rendering like in the FlatList example.
When we examine the two codes, we will find out that the ScrollView example was easier to set up when compared to that of FlatList. But we would choose FlatList over ScrollView because our list is large and expected to grow. FlatList will improve the performance of our code because it renders only items visible on the screen.
Summary
If we have a small to moderate amount of content, or a simple scrollable view, we can use ScrollView. For larger lists, lists with dynamic content, or lists that need performance optimizations, FlatList is the recommended choice.
Kindly find the complete example codes for FlatList and ScrollView below. You can grow the list and adjust them and see how each performs.
Use the Expo Go app to run and test your code in real time.
Example 1: FlatList (complete code)
Example 2: ScrollView (complete code)